Tex-Mex Classic with Sauce, Cheese & Variations Recipe
If you’ve ever craved a comforting meal that brings a burst of flavor with every bite, this Tex-Mex Classic with Sauce, Cheese & Variations is going to be your new go-to dish. This vibrant recipe perfectly balances rich, cheesy goodness with a tantalizing sauce and endless customization options that keep it fresh and exciting. Whether you’re a Tex-Mex veteran or just starting to explore these bold flavors, this dish offers something special for every palate.
Ingredients You’ll Need
Gathering simple, quality ingredients is the first step to mastering this Tex-Mex Classic with Sauce, Cheese & Variations. Each component plays its role—from melty cheeses adding creaminess, to the sauce that ties all the flavors together with just the right amount of tang and spice.
- Ground beef: Provides a savory, hearty base full of flavor.
- Onion: Adds sweetness and depth when sautéed.
- Garlic: Gives an aromatic punch to the dish.
- Tomato sauce: Forms the rich foundation of the sauce.
- Chili powder: Brings authentic Tex-Mex spice without overpowering.
- Cumin: Adds earthiness and warmth to the flavor profile.
- Sharp cheddar cheese: Melts perfectly for that gooey, luscious texture.
- Monterey Jack cheese: Offers a mild creaminess that balances the dish.
- Flour tortillas: Essential to wrap everything up and add a soft, chewy bite.
- Fresh cilantro: Brightens the dish with its herbal freshness.
- Sour cream: Optional but highly recommended for cooling heat on the palate.
How to Make Tex-Mex Classic with Sauce, Cheese & Variations
Step 1: Prepare the Savory Filling
Start by browning the ground beef in a large skillet over medium heat. As it cooks, add diced onions and minced garlic to build depth of flavor. Once the beef is fully cooked and onions are translucent, drain any excess fat to keep the dish balanced. Then, stir in tomato sauce, chili powder, cumin, and a pinch of salt. Let this mixture simmer for 10 minutes to allow the flavors to meld beautifully.
Step 2: Incorporate Cheese for Creamy Goodness
While the sauce thickens, shred your cheeses—sharp cheddar and Monterey Jack are the perfect duo for this Tex-Mex Classic with Sauce, Cheese & Variations. Sprinkle half of the cheese over the beef mixture and gently stir until melted and well combined, infusing the filling with irresistible cheesiness.
Step 3: Assemble Your Tex-Mex Masterpiece
Lay out your soft flour tortillas on a clean surface. Spoon generous amounts of the cheesy beef filling onto each tortilla, then roll them tightly. You can choose to leave them as is or bake them covered in more sauce and cheese for an extra melty finish—both ways are utterly delicious.
Step 4: Bake or Serve Fresh
For a bubbly, golden topping, place rolled tortillas in a baking dish, pour reserved sauce on top, and sprinkle with remaining cheese. Bake at 375°F (190°C) for about 15 minutes until cheese is melted and slightly browned. If you prefer a quicker meal, serve the filled tortillas right away with a drizzle of warm sauce.
How to Serve Tex-Mex Classic with Sauce, Cheese & Variations

Garnishes
Nothing elevates this Tex-Mex Classic with Sauce, Cheese & Variations like fresh garnishes. A sprinkle of chopped cilantro adds a pop of color and fresh herbaceous notes, while dollops of sour cream provide cooling contrast to the warm spices. Add sliced jalapeños or diced avocado if you want a creamy heat or extra richness.
Side Dishes
Complement your main dish with traditional Mexican sides like Spanish rice or refried beans to complete the experience. For a lighter touch, serve alongside a crisp mixed greens salad tossed with lime vinaigrette. Corn on the cob with a slathering of chili-lime butter also pairs beautifully, rounding out a satisfying meal.
Creative Ways to Present
If you’re hosting, consider turning this dish into a fun build-your-own taco bar. Provide extra warm tortillas, bowls of the sauce, cheese, fresh veggies, and all your favorite toppings so everyone can customize their plate. Another festive idea is to bake the filled tortillas in a casserole style, slicing into warm, cheesy squares that are perfect for sharing.
Make Ahead and Storage
Storing Leftovers
Simply transfer any leftovers into an airtight container and refrigerate. Properly stored, your Tex-Mex Classic with Sauce, Cheese & Variations will stay fresh and tasty for up to 4 days. Reheat gently to preserve the creamy texture and bold flavors.
Freezing
This dish freezes remarkably well. Wrap individual portions tightly in plastic wrap and aluminum foil, then place them in a freezer-safe container or bag. You can freeze for up to 3 months, making it a convenient option for future meals that require minimal effort.
Reheating
For best results, thaw frozen portions overnight in the refrigerator. Reheat in the oven at 350°F (175°C) covered with foil for 15–20 minutes or until warmed through. Alternatively, microwave on medium power in short bursts to avoid drying out the sauce and cheese.
FAQs
Can I use chicken instead of beef in this Tex-Mex Classic with Sauce, Cheese & Variations?
Absolutely! Ground chicken or shredded rotisserie chicken work wonderfully and add a lighter twist without sacrificing flavor. Just adjust cooking times accordingly to ensure the chicken stays juicy.
What types of cheese work best for this dish?
Cheddar and Monterey Jack are traditional for their melting qualities and flavor balance. However, you can experiment with Pepper Jack for a spicy kick or even a mild mozzarella for creaminess.
Is it possible to make this recipe vegetarian?
Yes! Swap out the meat for sautéed mushrooms, black beans, or a combination of roasted vegetables. The sauce and cheese will still create that classic Tex-Mex feel everyone loves.
How spicy is this dish?
The heat level is moderate thanks to the chili powder, but you can adjust it easily by adding more or less spice, or by including jalapeños or hot sauce to taste.
Can I prepare this recipe ahead of time for a party?
Definitely! Assemble the tortillas and sauce the day before, cover tightly, and refrigerate. Bake just before serving to enjoy warm, gooey deliciousness with minimal last-minute fuss.
Final Thoughts
This Tex-Mex Classic with Sauce, Cheese & Variations truly is a celebration of bold flavors, comforting textures, and endless possibilities. From cozy family dinners to festive gatherings, it’s a recipe that invites creativity and satisfies every craving. Don’t hesitate—gather your ingredients and share this joyful dish with your loved ones soon. Your taste buds will thank you!
PrintTex-Mex Classic with Sauce, Cheese & Variations Recipe

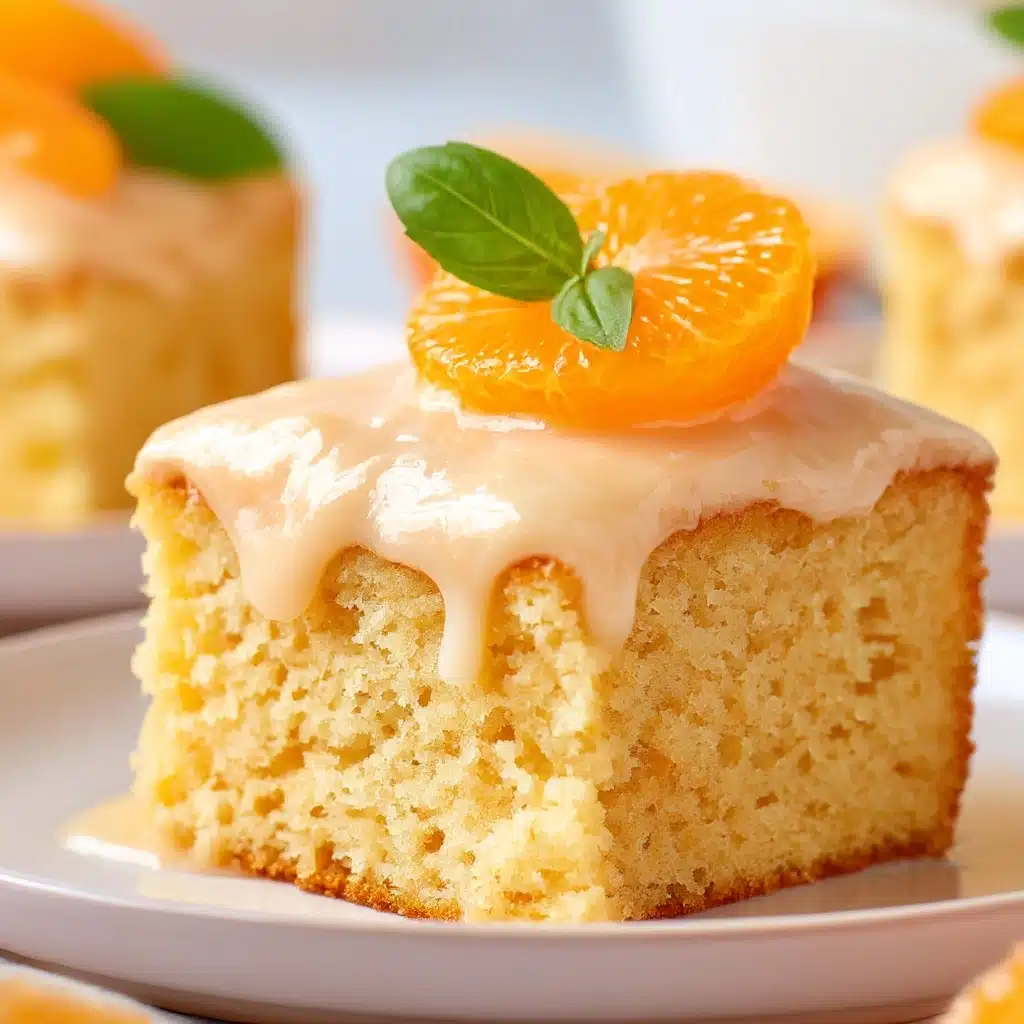
This Orange Creamsicle Cake is a delightful, nostalgic dessert that combines moist, fluffy cake infused with fresh orange juice and zest, layered with a light and creamy orange buttercream frosting. Perfect for citrus lovers, this cake balances the tangy brightness of orange with sweet vanilla undertones, making it a refreshing treat for any occasion.
- Prep Time: 20 minutes
- Cook Time: 30 minutes
- Total Time: 1 hour 10 minutes
- Yield: 12 servings 1x
- Category: Dessert
- Method: Baking
- Cuisine: American
- Diet: Vegetarian
Ingredients
Cake Ingredients
- 2 ½ cups all-purpose flour
- 1 ½ cups granulated sugar
- 1 cup butter (softened)
- 4 large eggs
- ¾ cup fresh orange juice
- 1 tablespoon orange zest
- 1 teaspoon vanilla extract
- 1 cup buttermilk
- 2 teaspoons baking powder
- ½ teaspoon baking soda
- ½ teaspoon salt
Creamsicle Frosting Ingredients
- 1 cup butter (softened)
- 4 cups powdered sugar
- ¼ cup heavy cream
- 2 tablespoons fresh orange juice
- ½ teaspoon vanilla extract
- 1 teaspoon orange zest
Instructions
- Prepare the Dry Ingredients: In a medium bowl, whisk together the all-purpose flour, baking powder, baking soda, and salt. Set aside to ensure even distribution of leavening agents.
- Make the Batter: Preheat the oven to 350°F (175°C) and grease two 9-inch round cake pans. In a large bowl, beat the softened butter and granulated sugar using an electric mixer until light and fluffy, about 2-3 minutes. Add the eggs one at a time, beating well after each addition. Stir in the orange zest, fresh orange juice, and vanilla extract until combined. Gradually add the dry ingredients alternately with the buttermilk, mixing gently until just combined to avoid a dense cake.
- Bake the Cake: Divide the batter evenly between the two prepared pans. Bake in the preheated oven for 25-30 minutes or until a toothpick inserted into the center comes out clean. Let the cakes cool in the pans for 10 minutes before transferring them to a wire rack to cool completely.
- Prepare the Creamsicle Frosting: In a large bowl, beat the softened butter until creamy. Gradually add powdered sugar alternately with heavy cream and fresh orange juice. Stir in the vanilla extract and orange zest, then beat until the frosting is light, fluffy, and easy to spread.
- Assemble and Frost the Cake: Place one cake layer on your serving plate and spread a generous amount of frosting over the top. Add the second layer and cover the entire cake with the remaining frosting. Decorate the cake with candied orange slices, additional zest, or white chocolate shavings for an extra special touch.
- Serve and Enjoy: Let the cake set for about 30 minutes to allow the frosting to firm up before slicing. Serve chilled or at room temperature alongside a cup of tea or a scoop of vanilla ice cream for the perfect balance of flavors.
Notes
- Use fresh orange juice and zest for the best vibrant citrus flavor; avoid artificial extracts.
- Do not overmix the batter to keep the cake light and fluffy.
- Incorporate buttermilk or add 2 tbsp sour cream for extra moistness.
- Chill frosting slightly before spreading to make it easier to work with.
- Allow the cake to cool completely before frosting to prevent melting.
- Store in an airtight container in the refrigerator for up to 5 days or freeze wrapped in plastic for up to 2 months.
- For vegan or gluten-free variations, substitute ingredients as outlined in the recipe guide.
Nutrition
- Serving Size: 1 slice (1/12 of cake)
- Calories: 420 kcal
- Sugar: 36 g
- Sodium: 210 mg
- Fat: 22 g
- Saturated Fat: 13 g
- Unsaturated Fat: 7 g
- Trans Fat: 0.5 g
- Carbohydrates: 52 g
- Fiber: 1.5 g
- Protein: 5 g
- Cholesterol: 85 mg
Keywords: Orange Creamsicle Cake, Citrus Cake, Orange Cake, Buttercream Frosting, Creamsicle Dessert, Summer Cake, Citrus Dessert