Healthy No Bake Protein Balls with PB Flavor Recipe
If you’re on the lookout for a snack that’s as satisfying as it is nourishing, you’re going to fall head over heels for these Healthy No-Bake Protein Balls with PB Flavor. Packed with wholesome ingredients and bursting with that irresistible peanut butter richness, these little powerhouses are perfect for a quick energy boost or a guilt-free treat any time of day. The best part? No oven required, making them super easy to whip up and enjoy whenever your cravings strike.
Ingredients You’ll Need
Getting started with these Healthy No-Bake Protein Balls with PB Flavor is a breeze because the ingredients are straightforward but thoughtfully selected. Each element adds not just flavor but texture, nutrition, and that signature peanut butter warmth you’ll adore.
- Rolled oats: The perfect base to give your balls a hearty, chewy texture and fiber boost.
- Natural peanut butter: This star ingredient adds creaminess, protein, and of course that beloved peanut butter flavor.
- Honey or maple syrup: A natural sweetener that balances the savory peanut butter with a gentle touch of sweetness.
- Chia seeds or flaxseeds: Tiny nutrition powerhouses that add omega-3s, fiber, and a bit of crunch.
- Vanilla extract: Just a splash to elevate the flavor complexity with subtle aromatic notes.
- Protein powder (optional): Great for an extra protein punch, making these balls perfect for post-workout refueling.
- Mini chocolate chips or cacao nibs (optional): For those who want a little decadent surprise inside each bite without tipping the health scale too much.
How to Make Healthy No-Bake Protein Balls with PB Flavor
Step 1: Mix the Base Ingredients
Start by combining the rolled oats, natural peanut butter, and your choice of sweetener in a large bowl. Stir them together gently until the mixture looks evenly combined. This is the foundational step where the magic begins, as the peanut butter binds everything together while delivering that unmistakable PB flavor.
Step 2: Add Nutritional Boosters
Next, toss in your chia or flaxseeds along with the vanilla extract and protein powder if you’re using it. These ingredients not only amp up the nutritional value but also add interesting texture contrasts that make every bite exciting. Mix thoroughly to distribute these goodies evenly throughout the dough.
Step 3: Include Optional Mix-Ins
If you love a hint of chocolate, gently fold in mini chocolate chips or cacao nibs here. These options add a touch of indulgence while staying true to the health-conscious spirit of your protein balls. Remember, a little goes a long way to keep the balance just right.
Step 4: Shape Your Balls
Using your hands or a small scoop, roll the mixture into evenly sized balls – about one to one and a half inches in diameter. The ease of shaping these no-bake treats makes the whole process fun and interactive, perfect for a quick kitchen activity or even involving the kids.
Step 5: Chill Until Set
Place the formed balls on a parchment-lined tray or plate, and pop them into the refrigerator for at least 30 minutes to firm up. Chilling ensures they hold their shape and develop that perfect chewy texture you’re aiming for. Patience here pays off deliciously!
How to Serve Healthy No-Bake Protein Balls with PB Flavor

Garnishes
To make your Healthy No-Bake Protein Balls with PB Flavor even more appealing, try rolling them in crushed nuts, shredded coconut, or a dusting of cocoa powder before chilling. These simple garnishes not only enhance the visual appeal but also introduce extra layers of texture and flavor that make each bite more delightful.
Side Dishes
Pair these protein balls with fresh fruit slices like apple or banana for a refreshing contrast, or enjoy alongside a cup of herbal tea or your favorite coffee for a balanced snack break. Their portable, mess-free nature means you can easily complement your protein balls with light sides for any time of day.
Creative Ways to Present
If you’re bringing these treats to a gathering or want to jazz up your snack game, arrange the balls attractively in small decorative bowls or stack them on a pretty platter lined with parchment. You can even skewer a few on decorative toothpicks for a nifty grab-and-go presentation that’s as eye-catching as it is tasty.
Make Ahead and Storage
Storing Leftovers
Your Healthy No-Bake Protein Balls with PB Flavor keep beautifully in an airtight container stored in the refrigerator for up to one week. Keeping them chilled not only maintains their shape but also keeps the peanut butter fresh and the seeds crunchy.
Freezing
For longer-term storage, these protein balls freeze wonderfully. Just spread them out on a baking sheet lined with parchment paper, freeze until firm, and then transfer into a freezer-safe container or bag. When you want a quick snack, simply thaw a few at room temperature for about 15 minutes or enjoy them straight from the freezer for a chilly treat.
Reheating
While these protein balls are best enjoyed cold or at room temperature, if you prefer them slightly softer, you can let them sit out for a short while. Avoid microwaving since it can alter the texture and cause the peanut butter to separate. Their simplicity means they’re ready to enjoy as is, no reheating necessary.
FAQs
Can I use other nut butters instead of peanut butter?
Absolutely! Almond butter or cashew butter work beautifully and give a slightly different but equally delicious flavor profile. Keep in mind varying moisture contents may require slight adjustment of oats or sweetener.
Are these protein balls suitable for vegans?
They can be! Just make sure to use a plant-based protein powder and swap honey for maple syrup or agave nectar to keep the recipe completely vegan.
How many protein balls does this recipe make?
You can expect to get about 15 to 20 balls, depending on the size you choose to make. They store well, so it’s wonderful to prepare a batch ahead and have healthy snacks ready whenever needed.
Can kids eat these protein balls?
Definitely! They’re a nutritious and tasty option that kids often love, especially if you include chocolate chips. Just check for any nut allergies beforehand and adjust ingredients if necessary.
What if I don’t have protein powder?
No worries at all. The protein balls are still delicious without it and will have a slightly softer texture. You can increase the seeds or nuts to keep up the protein content naturally.
Final Thoughts
These Healthy No-Bake Protein Balls with PB Flavor have quickly become one of my go-to snacks whenever I need something nourishing and satisfying in a snap. Their ease, wholesome ingredients, and delightful peanut butter taste make them a true crowd-pleaser. I can’t wait for you to try making them yourself and watch them become a staple in your snack rotation too!
PrintHealthy No-Bake Protein Balls with PB Flavor Recipe
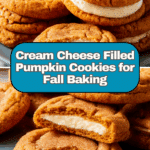
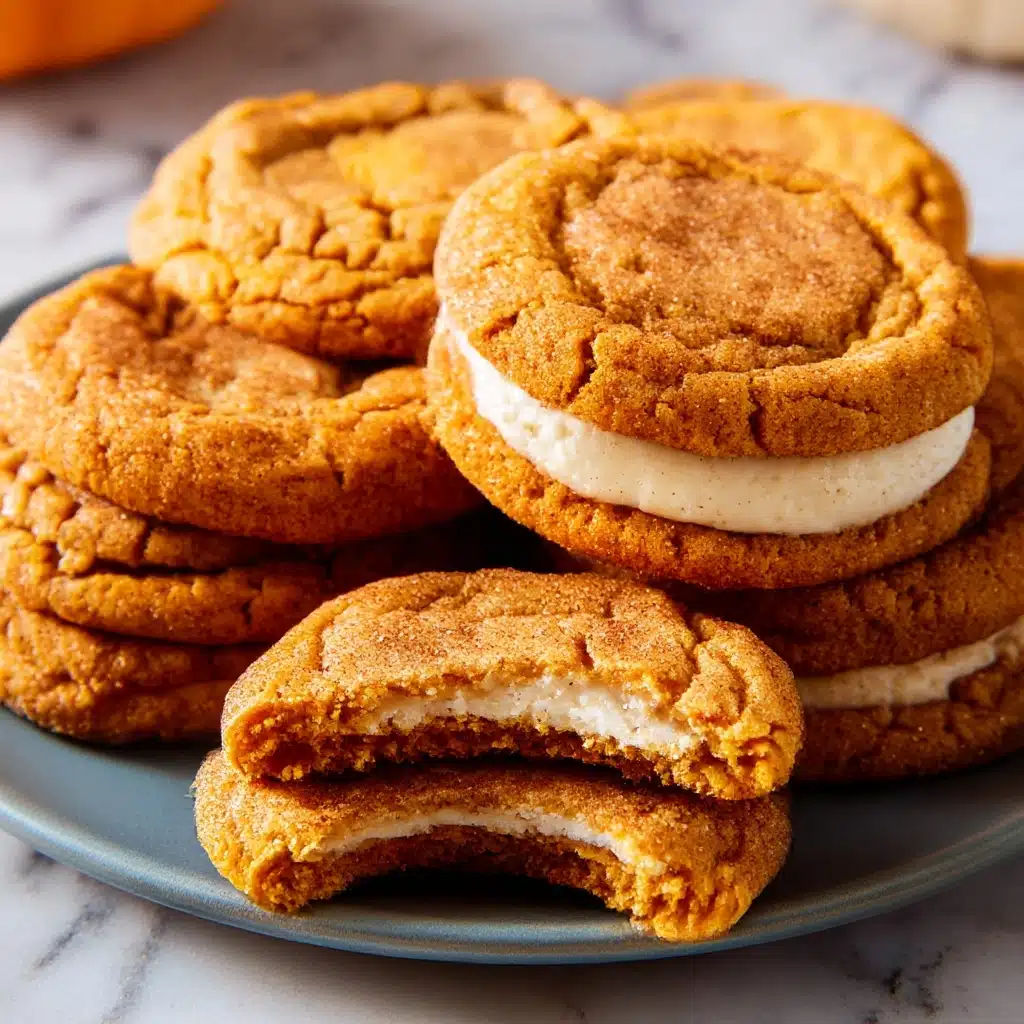
Delightfully moist and flavorful Pumpkin Cheesecake Cookies combine a spiced pumpkin cookie base with a creamy cheesecake filling, perfect for fall gatherings or anytime you crave a cozy treat.
- Prep Time: 15 minutes
- Cook Time: 14 minutes
- Total Time: 1 hour 15 minutes
- Yield: About 24 cookies 1x
- Category: Pumpkin Recipes
- Method: Baking
- Cuisine: American
- Diet: Vegetarian
Ingredients
For the Pumpkin Cookie Base
- 1 cup (226g) unsalted butter, softened
- 1 cup (200g) light brown sugar
- 1/2 cup (100g) granulated sugar
- 3/4 cup (180g) canned pumpkin puree (not pumpkin pie filling)
- 1 large egg
- 2 teaspoons vanilla extract
- 2 1/2 cups (310g) all-purpose flour
- 1 teaspoon baking soda
- 1/2 teaspoon baking powder
- 1/2 teaspoon salt
- 1 tablespoon pumpkin pie spice
- 1 teaspoon ground cinnamon
For the Cheesecake Filling
- 8 oz (226g) cream cheese, softened
- 1/4 cup (50g) granulated sugar
- 1 teaspoon vanilla extract
- 1 tablespoon all-purpose flour
Instructions
- Make the Cheesecake Filling: In a medium bowl, beat the cream cheese until smooth and free of lumps. Add the granulated sugar, vanilla extract, and flour, and mix until the filling is completely smooth. Transfer the mixture to a piping bag or a zip-top bag with one corner snipped off. Chill in the refrigerator for at least 30 minutes while preparing the cookie dough.
- Make the Pumpkin Cookie Dough: In a large bowl, beat together the butter, brown sugar, and granulated sugar until light and fluffy, about 2 to 3 minutes. Add the pumpkin puree, egg, and vanilla extract and mix until well combined. In a separate bowl, whisk together the flour, baking soda, baking powder, salt, pumpkin pie spice, and cinnamon. Gradually mix the dry ingredients into the wet ingredients until a soft dough forms. Cover and chill the dough for 30 minutes to help the cookies keep their shape while baking.
- Shape and Bake the Cookies: Preheat the oven to 350°F (175°C) and line two baking sheets with parchment paper. Scoop about 2 tablespoons of dough for each cookie and roll into balls. Place the dough balls 2 inches apart on the prepared baking sheets. Flatten each one slightly, then use your thumb or the back of a spoon to press a shallow well into the center of each dough ball. Bake for 12 to 14 minutes, or until the edges are set and the tops look just done. Remove from the oven and, if needed, use the back of a spoon to gently press down the centers again. Allow the cookies to cool on the baking sheets for 5 minutes before transferring to a wire rack to cool completely.
- Fill with Cheesecake: Once the cookies are fully cooled, pipe about 1 to 1½ teaspoons of the chilled cheesecake filling into the center of each cookie. Smooth the top if desired. Chill the filled cookies in the refrigerator for 20 minutes to allow the filling to set before serving.
Notes
- Store the cookies in an airtight container in the refrigerator for up to 4 days.
- Let sit at room temperature for 5–10 minutes before serving for the best texture.
- Use canned pumpkin puree, not pumpkin pie filling, for the best flavor and texture.
- Chilling the dough helps the cookies keep their shape during baking.
Nutrition
- Serving Size: 1 cookie
- Calories: 200 kcal
- Sugar: 14 g
- Sodium: 140 mg
- Fat: 11 g
- Saturated Fat: 6 g
- Unsaturated Fat: 4 g
- Trans Fat: 0 g
- Carbohydrates: 23 g
- Fiber: 1 g
- Protein: 3 g
- Cholesterol: 30 mg
Keywords: pumpkin cheesecake cookies, pumpkin cookies, cheesecake filling, fall cookies, baked pumpkin treats, spiced cookies